-
.
Hi everybody.
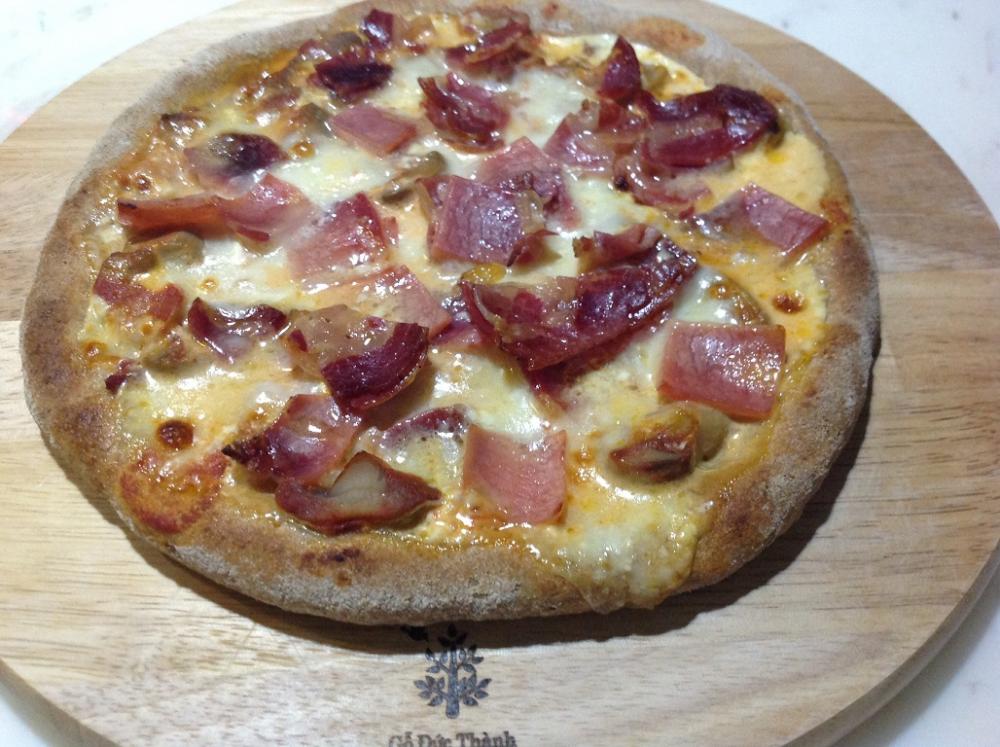
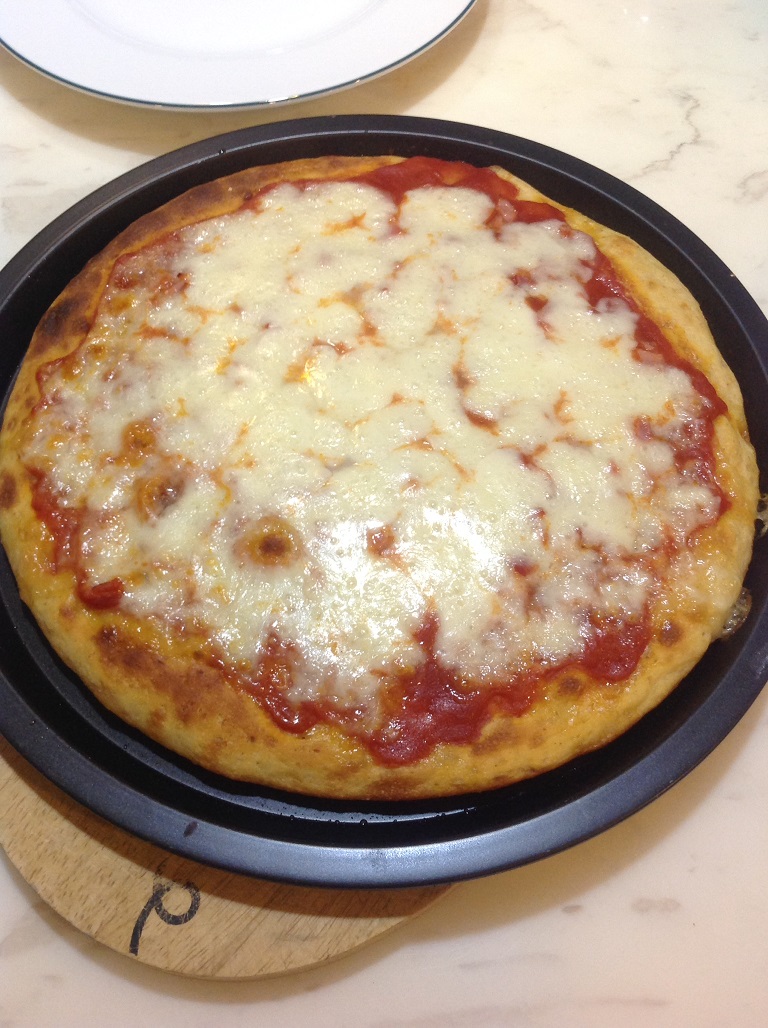
This post is to show you how I can prepare my pan pizza without using a kneading machine. This receipt is called "no knead dough" and is one of most consolidated and easy receipts of this forum. This is the traditional take-away pizza prepared and served in Rome. This is what we are speaking about:
These are the ingredients to prepare one 30x40cm rectangular pizza:
unbleached white wheat flour: 363g
cold water: 290g (keep the water in the fridge for few hours)
salt: 9g
olive oil: 8g
active yeast: 1g
Notes about the ingredients: need to use "strong" flour, the one used normally for the bread. In case of doubt, just read the quantity of protein: good value should be more than 13g every 100g. Water can be tap water but be sure it doesn’t smell chlorine or other cleaning chemicals normally used to sanitize the water. Otherwise you can use your favorite brand of bottled water. The quantity of water is around 80% of the quantity of flour. This parameter is important to ensure a perfect softness of your pan pizza. The yeast used on this receipt must be active, so must contain the Saccharomyces cerevisiae yeast. Other kind of risers (baking powder or chemical ones) will not work!
Take your cold water and pour the yeast inside. Stir until the yeast is completely melted in the water.
Pour all the flour inside the water and stir roughly with a fork. Add the salt and the oil and stir for a minute. Doesn’t worry if the mix is still full of lumps; just be sure that all the water is roughly incorporated in the flour. Don’t leave liquid water inside your bowl. Don’t press, don’t squeeze, and don’t stir too much. The mixture should looks like this: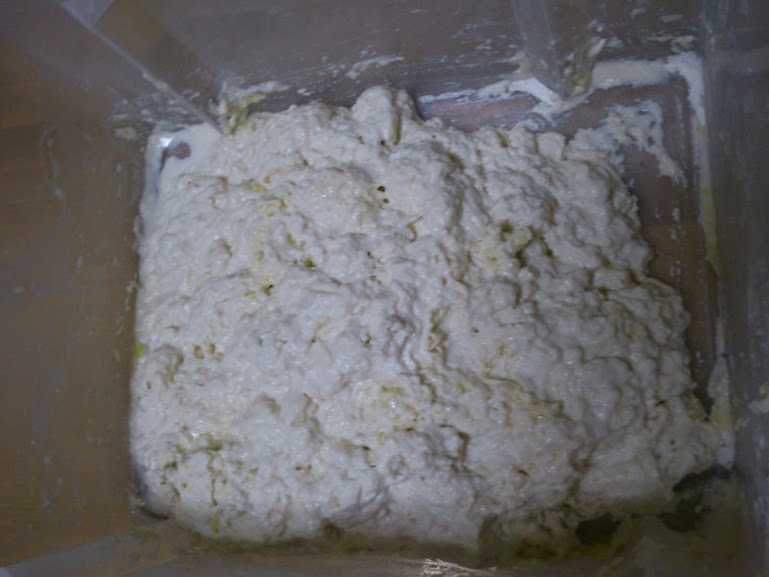
Cover the bowl with plastic film and keep it rest at ambient temperature for one hour. This time is necessary to re-activate the yeast and to let the water to start to transform the flour’s proteins into gluten chains.
Dredge your working table with flour and gently pour the mixture on it. You will immediately note that the mix is sticky, difficult to handle, full of lumps! This is perfectly normal at this stage.
Using a spatula (similar to the scrapers used by wall decorators), fold the “blob” in three parts, as shown in this video:
www.youtube.com/embed/KAd2tKeB6JY?wmode=transparent
www.youtube.com/embed/GIF3fMKyuls?ecver=2
Note for the beginners: need bit of experience and practice to familiarize with this operation. If you have problems handling the sticky dough, use some extra flour to dredge your table, tools and hands.
Keep the dough on the table, cover it with your bowl and let it rest for 15 minutes. Avoid the contact with the air, otherwise the dough will dry.
Repeat the folding operation, followed by 15 minutes rest. Fold and rest, fold and rest. The fold/rest activity must be done 4 times. If the first fold is sticky and difficult, step by step, the handling of the dough will become easier, the lumps will reduce and the aspect of the “blob” will be smoother. Just try to be as gentle is possible, don’t press, don’t squeeze and don’t knead. At this stage, the tiny part of yeast has started already to work and the dough is slowly increasing his volume. Kneading or manipulating the dough in an inappropriate way will cause a loosing of the fermenting gases.
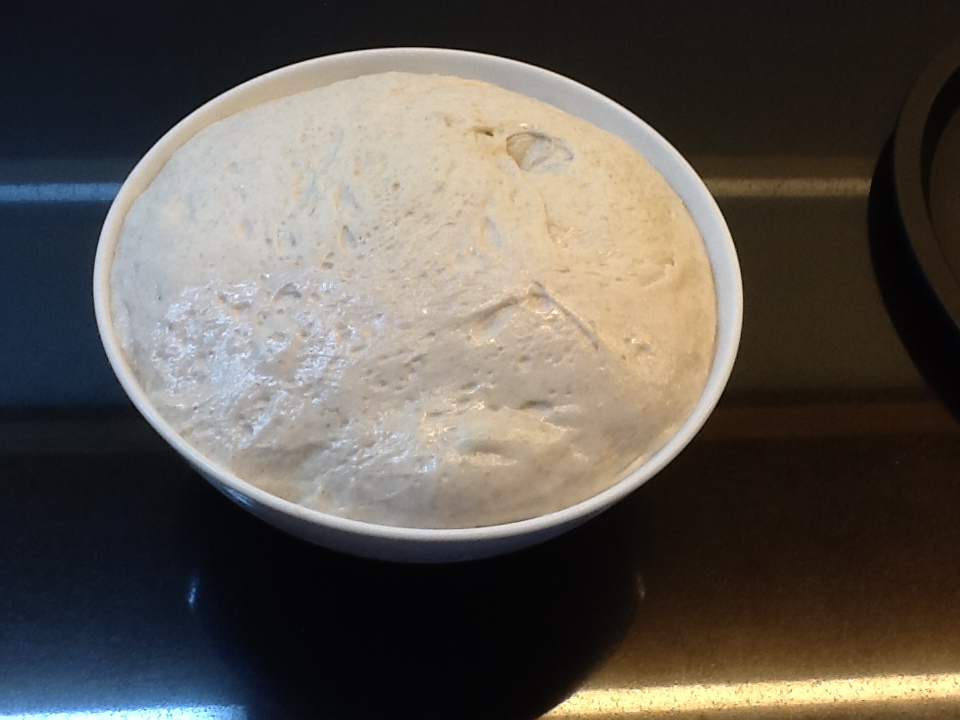
Put gently the dough inside a plastic case and cover it to avoid the contact with air. When you choose the plastic box, remember that the dough have to raise, so you need a box capable to contain more than two times the actual volume of the dough.
Put the box with the dough in the fridge for 24 hours. Slow fermentation is necessary to obtain a digestible pizza. This is just 50% of the fermenting time… Your pizza will be ready to bake after 48 hours of rest!
After 24 hours, take out the box with the dough from the fridge. Don’t worry if the dough is not raised too much (depending on the temperature of your fridge). Don’t forget that the dough have to rest 24 more hours.
Dredge your working table with bit of flour and very gently pour your dough on it. DO NOT manipulate and do not deflate the dough! Just capsize the box over the table and the force of gravity will do the rest! I’m using a plastic box; taking it out from the fridge, I have bit of condensation that will help me limiting the friction. Maybe you need to shake little bit the box, but proceed very gently. This system will work well.
Working with the fingertips only, gently fold the dough one more time and form a ball. Put this ball again in the covered box and put it in the fridge for other 20 hours.
Note: if you have a 30x40cm baking pan, your box should be rectangular. This will help you to spread the dough in the next steps. My baking pan is different (I have a round 28cm one!), so I must proceed in a different way: when my dough is on the working table, I divide it in two parts, using a sharp knife or a spatula. I obtain 2 pieces of dough with the same size (using a scale). Just remember to avoid deflating the dough. Using the fingertips, I fold each piece of dough and I form two balls. I put the balls in two big round covered bowls and put them in the fridge for 20 hours. The area of my 28cm baking pan is a half of the area of the 30x40cm one. That’s why I divide the whole dough in 2 parts. If you want to do 2 pizzas 30x40cm, just double the quantities and follow the same instructions to divide the dough.
After 20 hours, take out the dough’s box from the fridge and keep it rest 4 more hours at the room temperature. This step is necessary to let the dough to relax his gluten structure and grow up few more centimeters. After 4 hours, the dough will be smooth, bulging and ready to spread. This is the aspect of the box: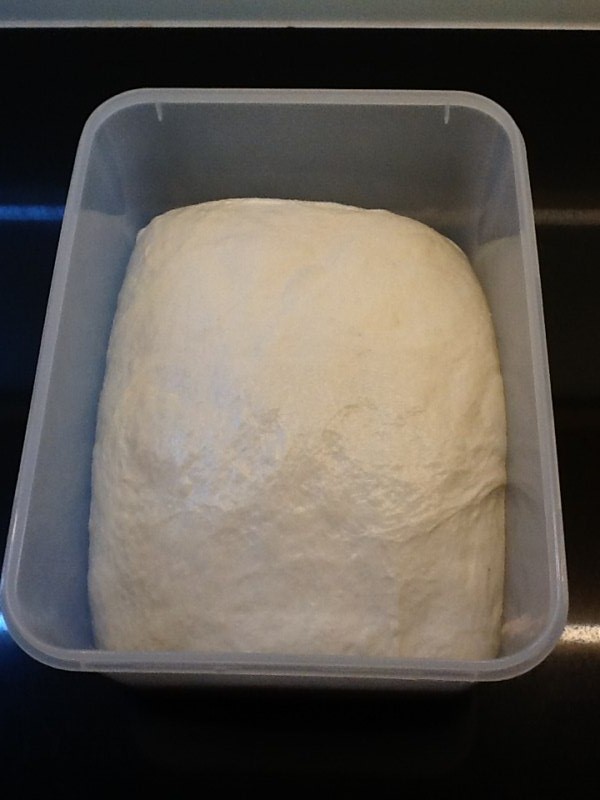
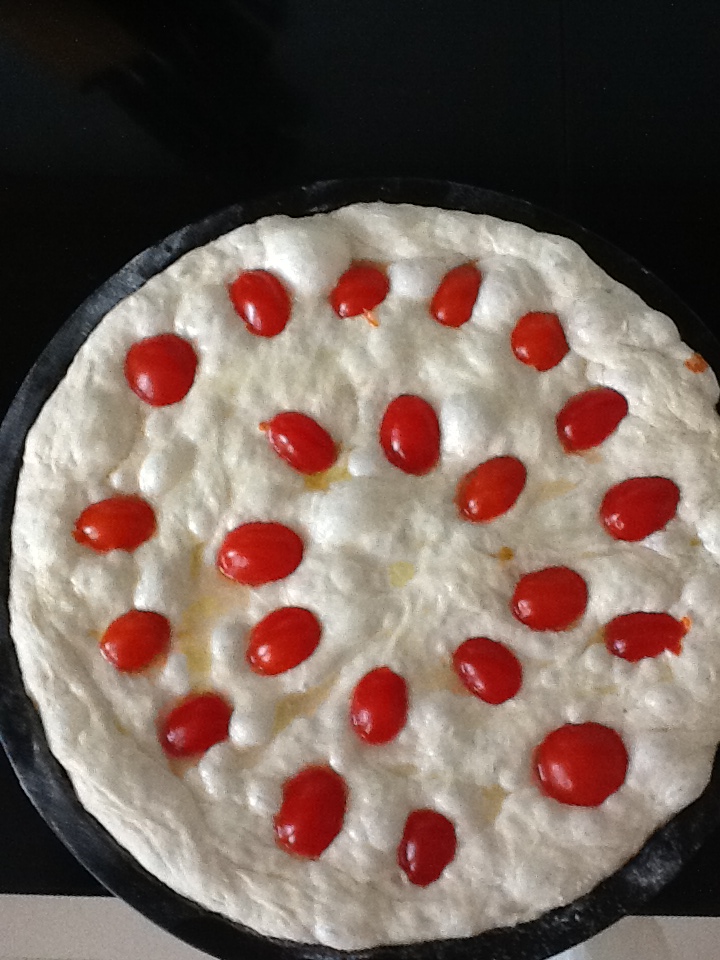
Dredge your working table with bit of flour and very gently pour your dough on it. If you use the semolina instead of the flour, your pan pizza will be crispier. Here is very important to don’t manipulate and don’t deflate the dough. Any wrong operation in this phase will result in a flat and hard pizza! Exactly like before, just capsize the dough’s box to let the dough to come out from the box.
Using the fingertips only, gently spread the dough. You have to obtain a 30x40cm sheet, 2 or 3cm thick.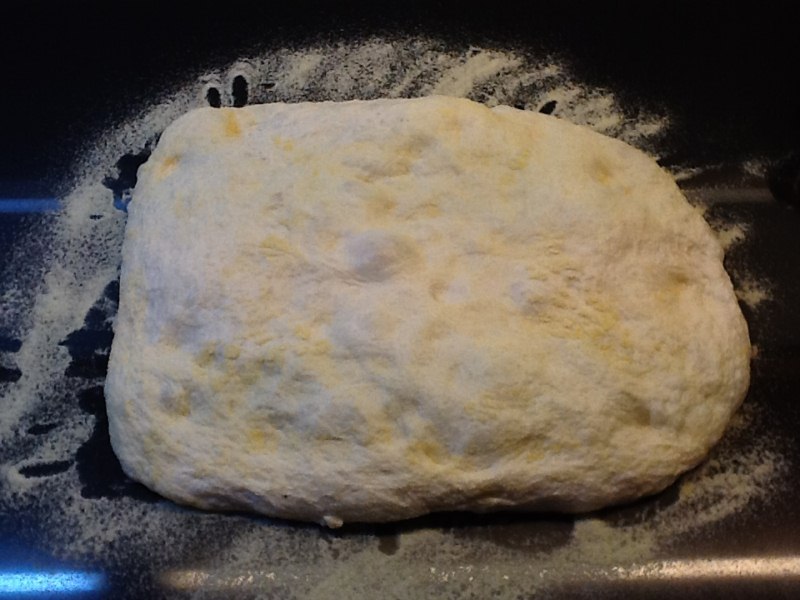
Slightly oil the surface of your baking pan. Oil layer should be very thin, eventually clean the excess of oil with a paper napkin. Gently lift the dough sheet, remove the excess of flour (shaking it little bit). The gluten structure of the dough should allow this operation, but if you can observe an anomalous stretching, stop the lifting: in this case the flour used is not strong enough and you risk breaking the dough sheet. Lay the dough sheet inside the baking pan paying attention to cover the entire surface and avoiding deflating. The thickness of the dough sheet should be constant on the whole surface.
Now you can follow two different ways: white pizza with oil and salt or traditional pizza, with tomato, mozzarella and your favorite toppings.
WHITE PIZZA
In a glass, prepare a mix with 50% of water and 50% of olive oil (best choice: extra-virgin olive oil). If you like, you can add some rosemary leafs or your favorite aromatic herbs.
Spread this mix on the top of your pizza, as shown in this picture: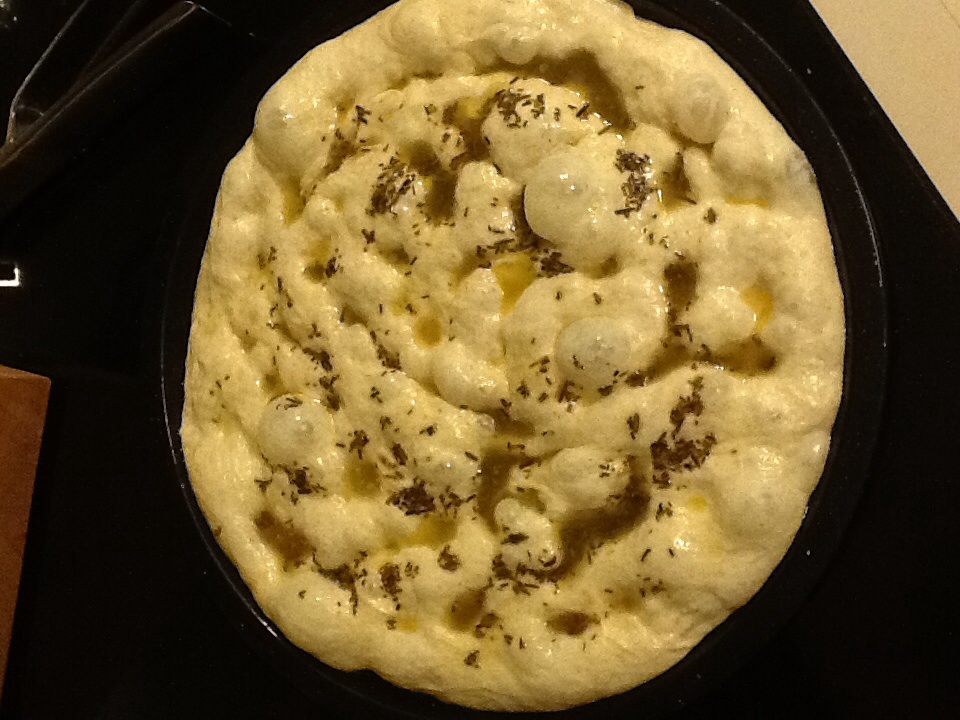

Don’t be worry if the pizza looks “flooded” with oil and water… The liquid will ensure the perfect softness during baking and the oven will dry the excess of liquid.
Spread some coarse salt on the surface of the pizza, but just little bit, otherwise the pizza will be too salty.
TRADITIONAL PIZZA
Take some fresh tomatoes; remove the skin, the internal water and seeds. Squeeze them to purée (a vegetable mill can be used) and pour them on the pizza. One or two leafs of fresh basil will “Italianize” the flavour. If you have other ingredients that requires to be cooked (zucchini, eggplants, mushrooms, etc.), slice them and put them on the top of the pizza. Cheese and other cooked ingredients will be added later.
Pre-heat your oven up to 300°C (570°F). Yes, good pizza requires high temperature! For a better result, your oven should be equipped with a refractory stone on the bottom.
When the oven is ready, put the baking pan inside, directly on the refractory surface. During the first part of the cooking, is important to give the heat from the bottom (this is the scope of the refractory stone). The dough is still soft and the liquid will keep it soft for few more minutes. This will give to the dough the possibility to grow up and develop the typical alveolus, for a perfect softness.
Cooking time is depending on your oven. Not less than 10 minutes, normally 15 are enough. Keeping your pizza under sight, it will be ready when the color is changing to light brown.
If you are cooking the TRADITIONAL PIZZA, you need to add the cheese 2 or 3 minutes before the end of the cooking: take out the pizza from the oven, spread some mozzarella cubes on the top and put again in the oven. In 2 or 3 minutes the mozzarella will be completed melted and the pizza will be ready.
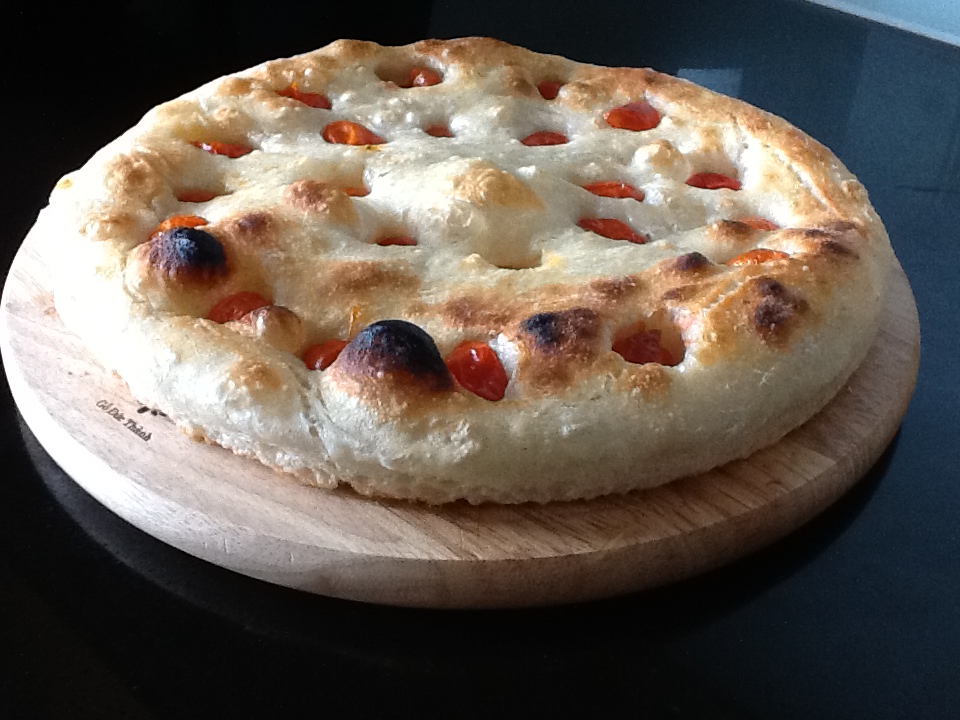
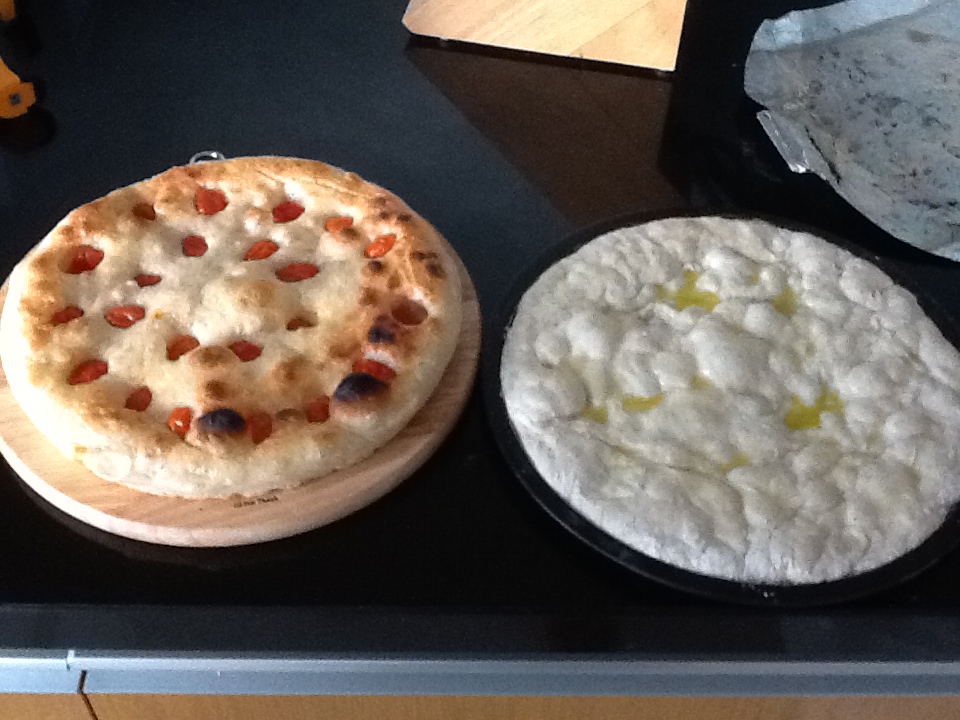
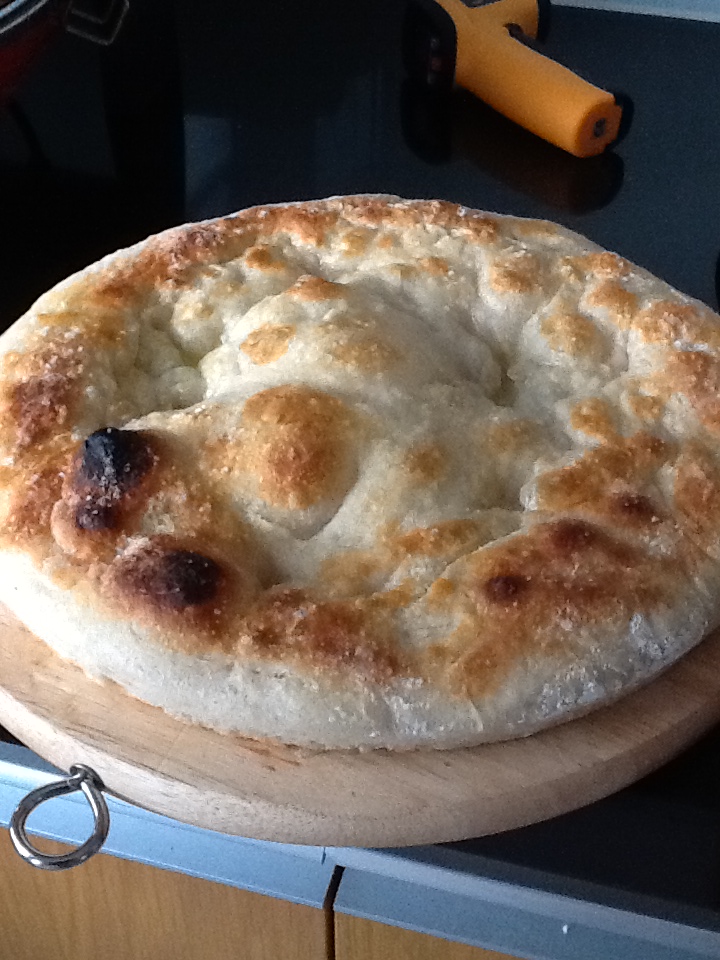
Some pictures of the white pizza and the traditional pizza: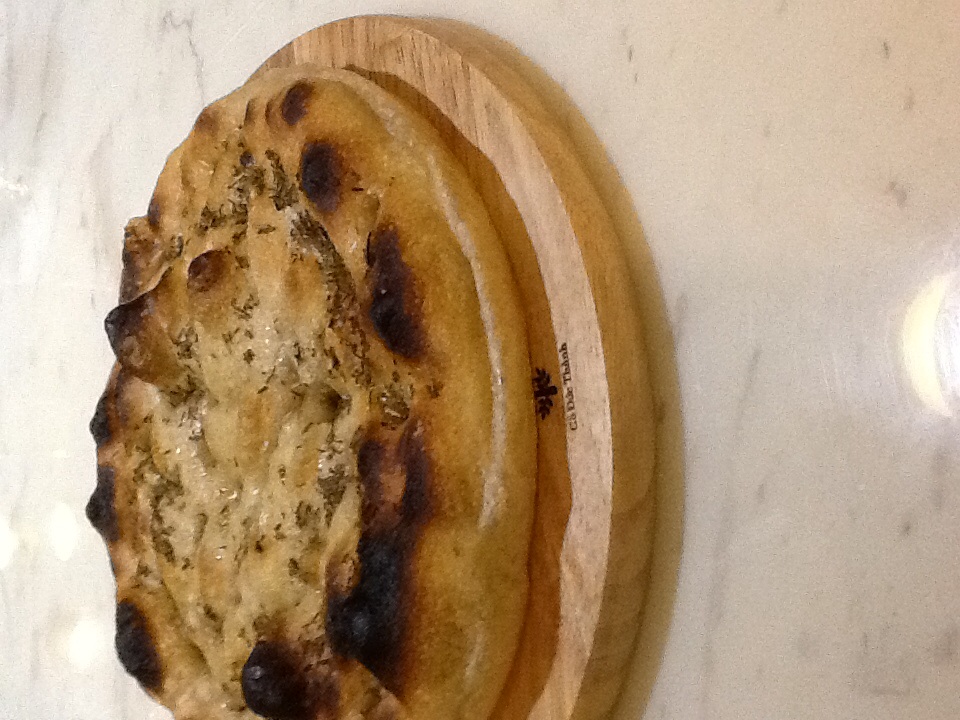
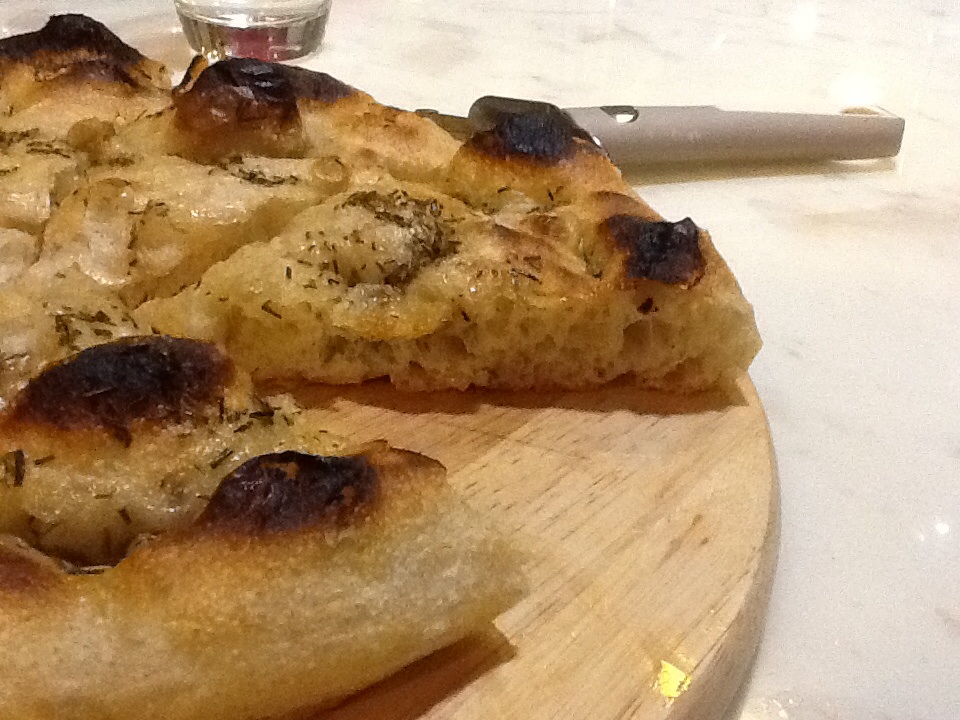
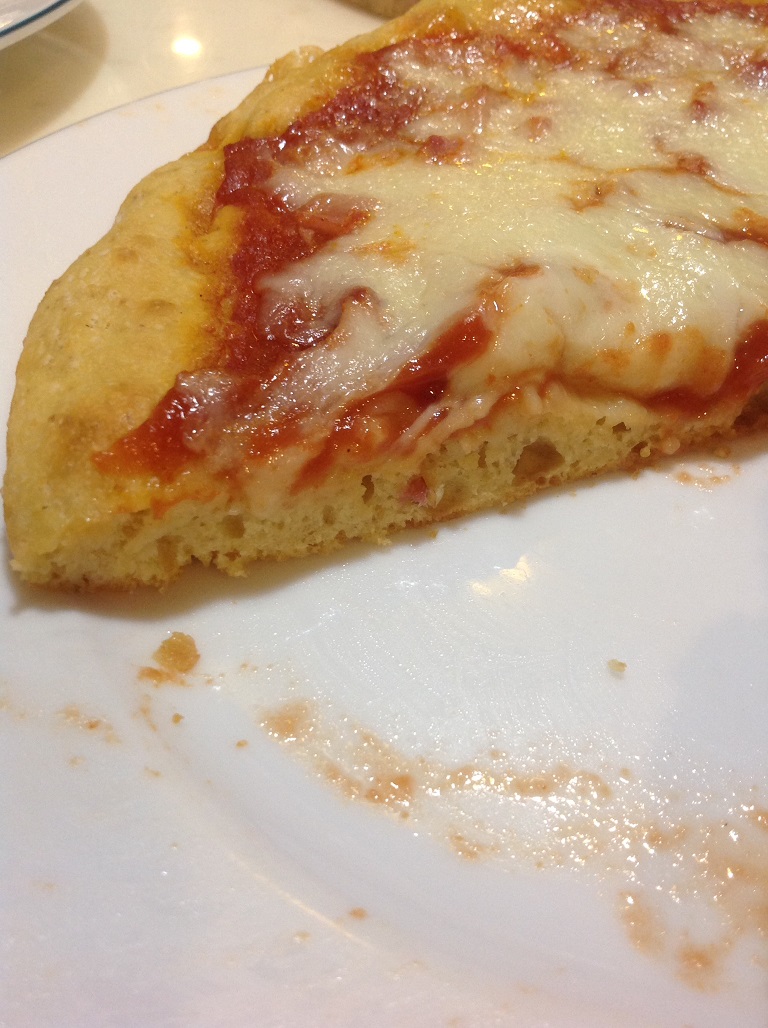
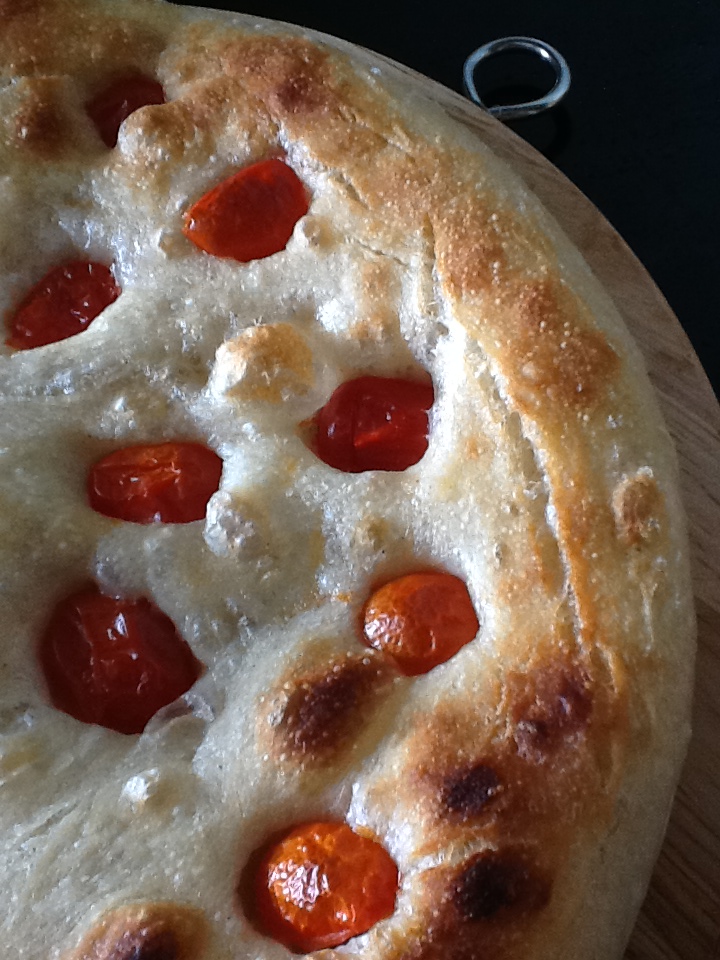
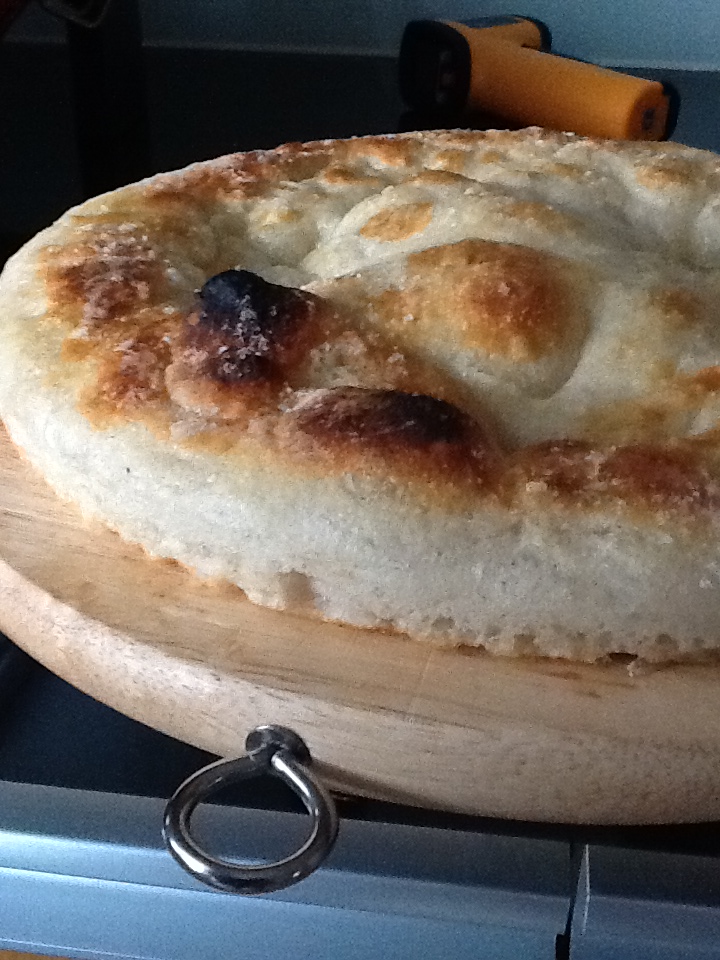
This is a particular of the section: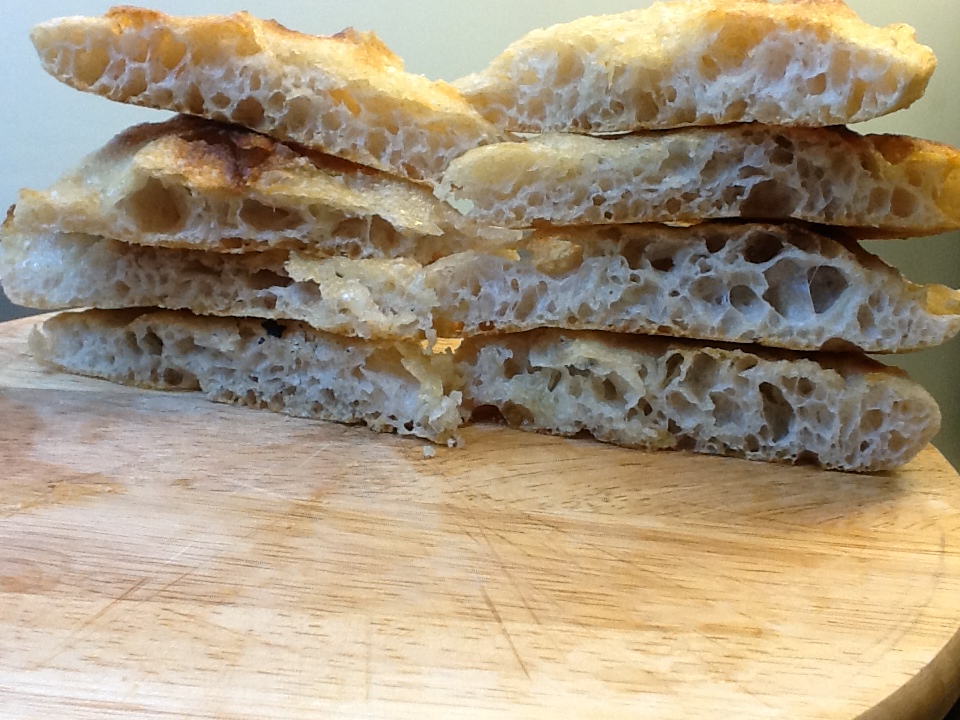
Crispy outside with incredibly soft heart!
Other pictures and particulars: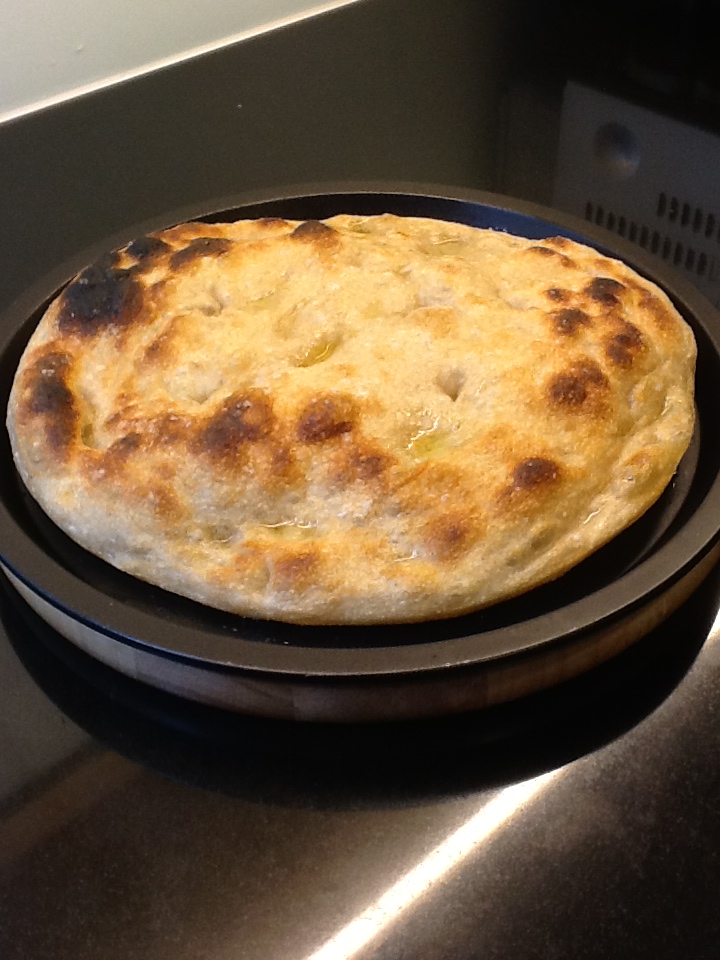
 .
. -
.
Perché in inglese?Non tutti sanno inglese . . -
.
Bestiada, ti stai internazionalizzando? Ahah! . -
.
Abbiamo aperto una sezione in inglese. In realtà, ci stiamo internazionalizzando tutti!  .
. -
.
Nella prima foto hai un contenitore identico al mio! . -
.

L'umile Cella di Notturno_Italiano
- Group
- Administrator
- Posts
- 32,213
- Location
- Roma - Castelli Romani
- Status
- Offline
It's a perfect thread.
Good work, Bestiada! .
. -
.
Se posso permettermi all'inizio scrivo "easy receipts" ma credo dovrebbe essere "easy recipe". Per il resto gran lavoro! Interessante! . -
.Abbiamo aperto una sezione in inglese. In realtà, ci stiamo internazionalizzando tutti!
Aaah, hai ragione. Perdonami, non avevo visto la sezione specifica. Beh, complimenti per la dedizione..
Pan pizza - No knead dough |